How to… Accept File Submissions Through a Form (Using the Gravity Forms File Upload Feature)

With the Gravity Forms File Upload feature, you can accept file submissions through your form, making it quick and easy to collect the information that you need. Whether you want people to upload documents, images, audio, or even videos, this is all possible with the Gravity Forms File Upload field.
In this ‘How to…’ article, we look at what the File Upload field can do, and how it can be used on your website. We then discuss how to add a File Upload field to a form, and importantly, what you can do with these user submissions once they come in.
Let’s get started…
Introducing the File Upload Field

File Upload is a powerful feature and can be used in a wide assortment of ways to help your forms achieve their goals.
By including the File Upload field on a form, you can allow people to submit…
- Documents
- Images
- Audio
- Videos
The Gravity Forms File Upload field also allows multi-file uploads, letting users upload more than one file.
So why might you want to use the File Upload feature on your forms?
How the File Upload Feature Can Be Used
There are numerous reasons you may want to add the file upload feature to a form. Here are a few examples…
- Employment Application Form – Accept CVs, Resumes, Cover Letters, and more, directly through an employment application form.
- User Registration Forms – Let users upload their profile photos or company logos to be displayed on profile pages.
- Online Courses / Educational Institutions – Accept course work, project proposals, and other relevant materials from your students.
- Competitions – Allow contestants to upload their art submissions, photographs, videos, or other competition entries.
- Support Documentation – Allow people to upload documents providing extra information to help your organization understand their issues and provide the correct support.
By enabling the File Upload feature within a form, you streamline the form submission process, collecting all the information you need in one go, and ensuring a high quality, efficient user-experience.
So let’s find out how to set up this feature within a form…
How to Add the File Upload Field to Your Form
The File Upload field can be added to any pre-existing form or new form.
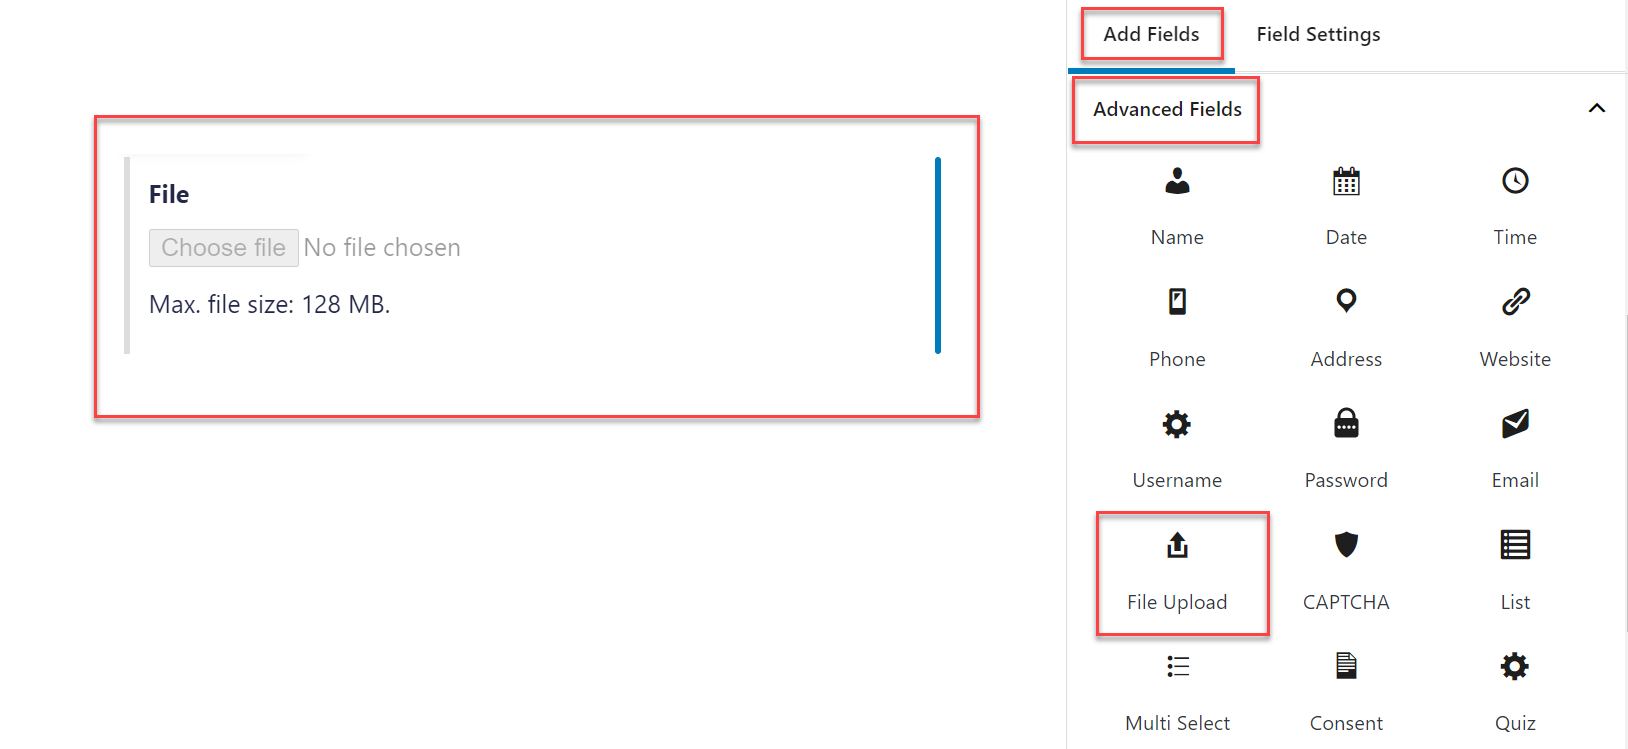
To add this field to a form, open the appropriate form and then select Add Fields > Advanced Fields from the menu on the right-hand side of the form builder. Then simply drag and drop the File Upload field into the form.
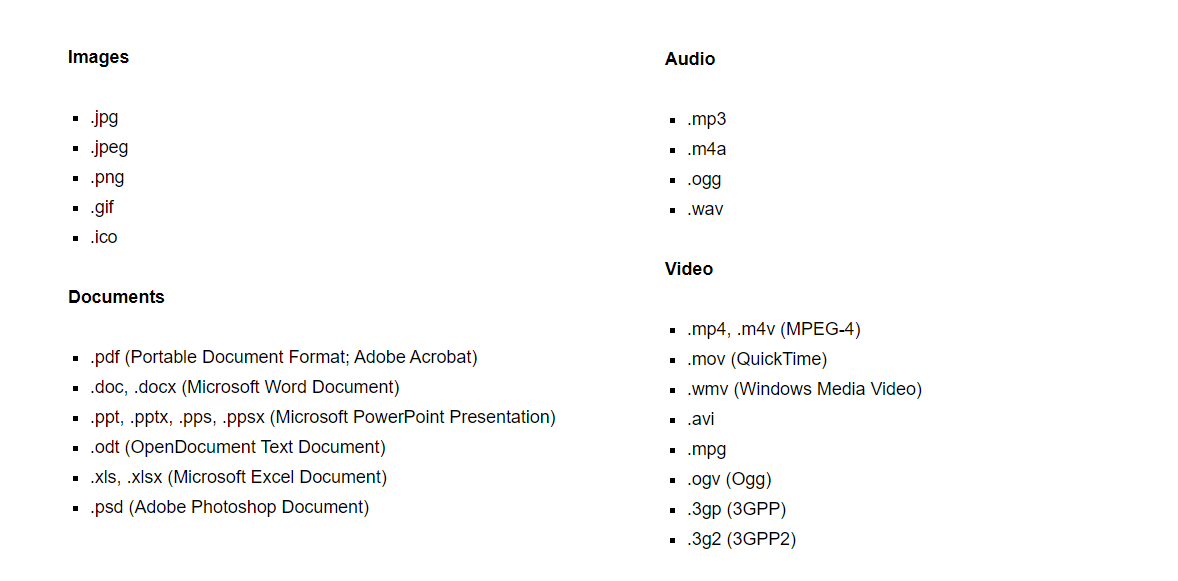
Next, within the General Field Settings for the File Upload field, you need to enter the file extensions that you want to accept in the upload. You can use any file type that is supported by WordPress core…
It is important to note that hosting providers often impose restrictions on uploads – this can be due to them not permitting certain file types or limitations with your hosting plan.
If you run into issues with file uploads, start by validating WordPress isn’t restricting the upload, and then get in contact with your host. For more information on this, check out the Gravity Forms documentation.
Gravity Forms also allows you to select a Maximum File Size for uploads, which can help you preserve your storage space. If you leave this field blank, Gravity Forms will default to the max size limit allowed by your server, and/or your WordPress installation.
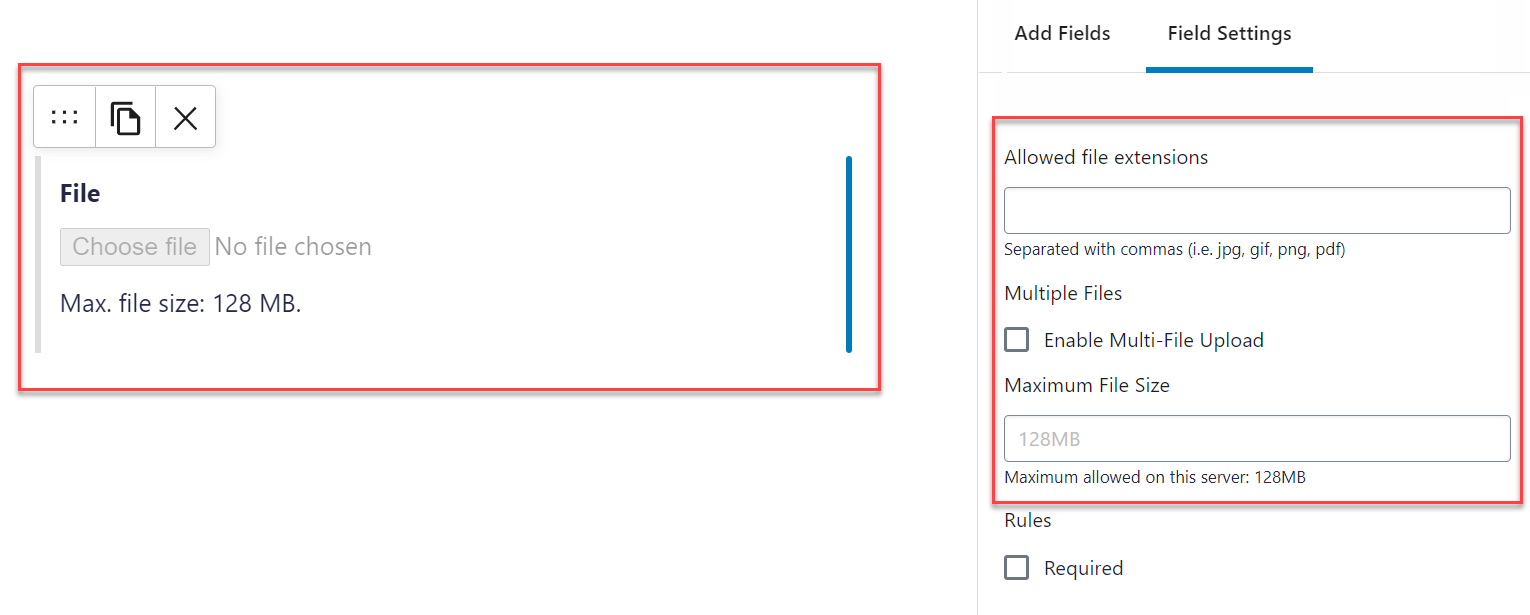
Lastly, within the File Upload Field Settings, you can also Enable Multi-File Uploads. This feature will allow users to upload multiple files in one go, saving people time and making the form submission process quick and easy.
For more information on the File Upload Field, check out this documentation.
File Uploads After Submission
Due to Gravity Forms’ extensive ecosystem of add-ons and third-party services, you have multiple options when it comes to storing, managing, and using the submitted files.
Here are a few popular examples of what can be done with file uploads after submission…
Dropbox
The Gravity Forms Dropbox Add-On enables you to send file uploads directly to your Dropbox account when a form is submitted. This helps you to store and organize the data collected and easily access it when needed.
The Dropbox Add-On also includes a Dropbox field, which you can add directly to a form – this then allows users to upload files from their own Dropbox account. Check out this Dropbox Guide in the docs to help you set up this useful add-on.
Zapier
The Gravity Forms Zapier Add-On facilitates form integration with over 2000 applications and third-party services. Simply create automated workflows (called Zaps) which will send your form entries to any service you select.
Zapier gives you a wide selection of options when it comes to file submissions and what to do with them. A good example is the option of sending file uploads to a variety of storage services, including Google Drive, Amazon S3, and Microsoft OneDrive, as well as many other applications. Check out the Zapier documentation to help you get started.
Advanced Post Creation
With the Gravity Forms Advanced Post Creation Add-On, you can set up posts or pages to be automatically created once a form is submitted. This feature is ideal for any situation where you are using user-generated content on your website. For example, guest posters submitting articles, users submitting information to a directory website, or sellers submitting products to sell on a marketplace.
The File Upload field works in conjunction with the Advanced Post Creation Add-On, enabling you to accept file uploads via your form and then easily display these documents, images, videos, or audio clips on the front end of your site. For more information on how to use this add-on, have a read of this article, Creating User Submitted Posts with Gravity Forms.
GravityView
One of the Gravity Forms Certified Developers, GravityView lets you quickly and easily display form entries on the front-end on your website. GravityView provides stylish pre-built layouts, so data entries can be displayed in a list view, table view, as a database, and more.
Using GravityView is an excellent option when it comes to displaying file uploads on the front-end of your site. Working in conjunction with Gravity Forms, file submissions become easy to collect and easy to display – simply set up the View and let GravityView do the rest.
Final Thoughts on How to Accept File Submissions Through a Form
Here on the Gravity Forms website, we also use the File Upload field extensively within our forms. Here a couple of examples of how and why we use this feature…
- A Case Study: How Gravity Forms Uses Gravity Forms and Gravity View to Power the Community Platform
- How Gravity Forms Uses Gravity Forms: A Job Application Form Case Study
Not a Gravity Forms customer yet? Sign up for our free demo to check out just how easy it is to add the File Upload field to a form. You can also view our numerous form templates as well as create your own forms.
Any questions on using the File Upload field? If so, please ask away in the comments below…

If you want to keep up-to-date with what’s happening on the blog sign up for the Gravity Forms newsletter!