How to Craft Great Form Confirmation Emails
The confirmation email is an important part of a form, but a lot of marketers overlook it. Many use a bland, generic message, and others don’t send a confirmation at all.
The purpose of a confirmation email is to verify a customer or subscriber’s form submission. This creates a record of the submission for them and begins an email-based relationship. Every form you create should automatically generate a confirmation email any time a user hits the submit button.
Order confirmation emails play a special part in your email marketing because they receive eight times as many opens as other types of messages. Since you know your customers and subscribers will read these emails, it’s critical that you optimize them for higher engagement. They can be far more than just a receipt.
In this article, we’ll offer some ways you can improve your form confirmation emails.
[content_upgrade cu_id=”14206″]Free download: 6 Ways to Get More Value Out of Your Form Confirmation Emails[content_upgrade_button]Click Here[/content_upgrade_button][/content_upgrade]
1. Use a Clear Subject Line
Sometimes it’s good to write clever, abstract, funny, or vague subject lines. This is not one of those times.
One of the reasons form confirmation emails receive such a high open rate is because users connect the subject line to an action they recently took. It’s important to write a subject line that reinforces this connection.
2. Keep it Short and Skimmable
Generally speaking, it’s best to keep all of your email communications short. Form confirmation emails are no exception. Your subscriber won’t spend more than a few seconds reading this email, so make sure to get your point across quickly without abusing their time.
If your form confirmation emails require more than a few sentences, use clever design to layout of the information in an easy-to-digest format. In some cases, a few line breaks and bolded words are all you need. In other cases, you may need to be crafty with the HTML.
3. Stick with Your Branding
Even though this is a short transactional email, it’s still a communication from your brand. It should contain some of the branding elements the recipient is used to. This helps them build an email-based relationship with your brand.
What kind of branding should you include? Your logo, at the very least. Use the same voice and tone that you use in your other marketing, as well.
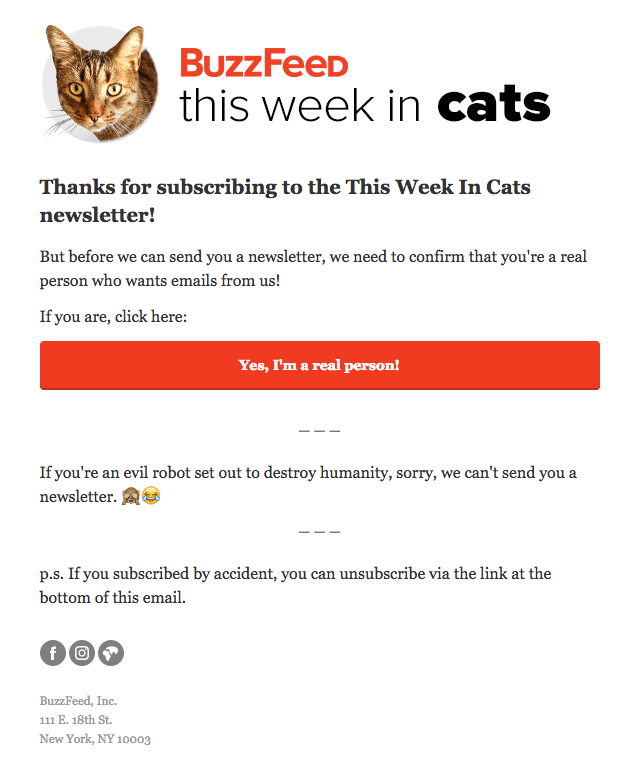
BuzzFeed’s confirmation email does a great job keeping things short while still incorporating the brand’s tone and voice.
4. Make Them Mobile Friendly
This should go without saying, but we didn’t want to leave it out. Every email you send to subscribers and customers should look great on any screen size. Make sure to test your emails with different browsers to understand the experience.
5. Give Them Facts Right Away
The first job of your email’s content – obviously – is to confirm their submission. Your first words should make a clear connection between the email and their recent action. Reinforce their excitement, quell any lingering anxiety they have over the submission, and alleviate any confusion. You don’t have to make things complicated here. Go with something simple, such as:
- “Thanks for subscribing!”
- “We received your message and will get back to you soon.”
- “Thanks for your order. We’ll let you know when we ship it.”
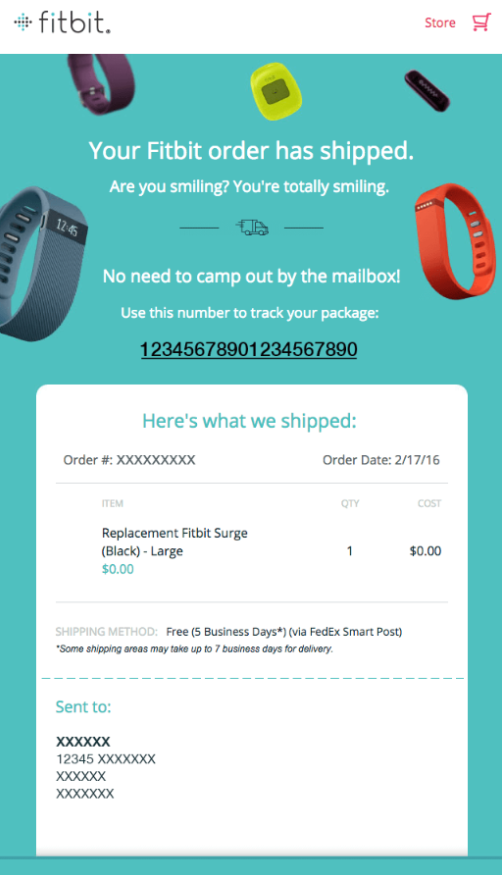
Fitbit’s confirmation email doesn’t bother with extra words. The email gets right to the point with the information the customer needs to verify their purchase.
6. Set Clear Expectations
Your order confirmation email isn’t just a place to verify what the subscriber has already done. It’s also where you can set expectations for what will happen.
This is especially important. You plan to deliver something in the future, like a lead magnet, a webinar, or a one on one consultation. Give your subscriber some kind of information about when they can expect the thing they signed up for.
If you don’t plan to give them something specific, explain what they can expect from your email communications in the future. Will they receive your regular blog content? Will you send them your latest discounts and promotions?
7. Help Them Receive Value
Depending on what your customers signed up for, it can help to give them some practical information about how to get the most value from it.
For instance, if they signed up for your latest membership course, you could point them toward resources to help them prepare beforehand. If they booked a phone call with you, you could list the information or documents they should have handy for the meeting.
If the new subscriber doesn’t need to know anything in particular, give them some tips to get more value from your email communications. You might tell them when to expect your emails or how to whitelist your address.
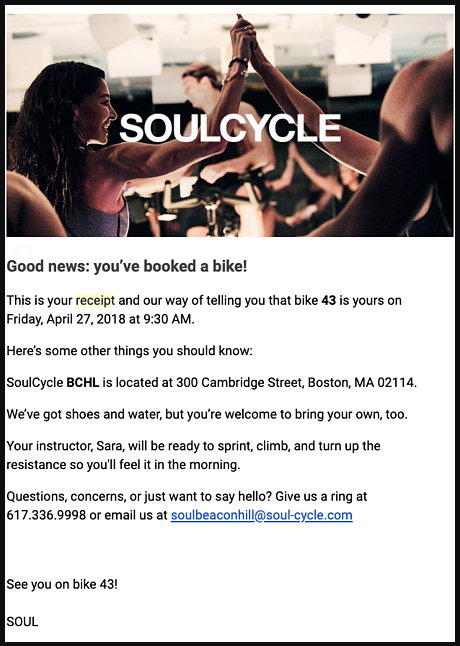
SoulCycle is a great example. When they confirm your booking, they send a short email with “some other things you should know,” like what you should bring, who will be your instructor, and how to get a hold of their support people.
8. End with a Call to Action
Every email you send to your customers and subscribers should finish with some kind of call to action. It doesn’t have to be much, but it’s important to take every opportunity to help your subscribers build a deeper relationship with your brand.
A confirmation email is a good time to ask them to…
- Opt into a loyalty program
- Follow you on social media
- Refer friends and family
- Take advantage of a special reward
Confirmation Emails with Gravity Forms
Designing form confirmation emails with Gravity Forms is simple, but we call them Notifications. We give them our own name to distinguish them from on-page confirmation messages that immediately let submitters know that form worked.
You can create and edit unique email notifications for each form.
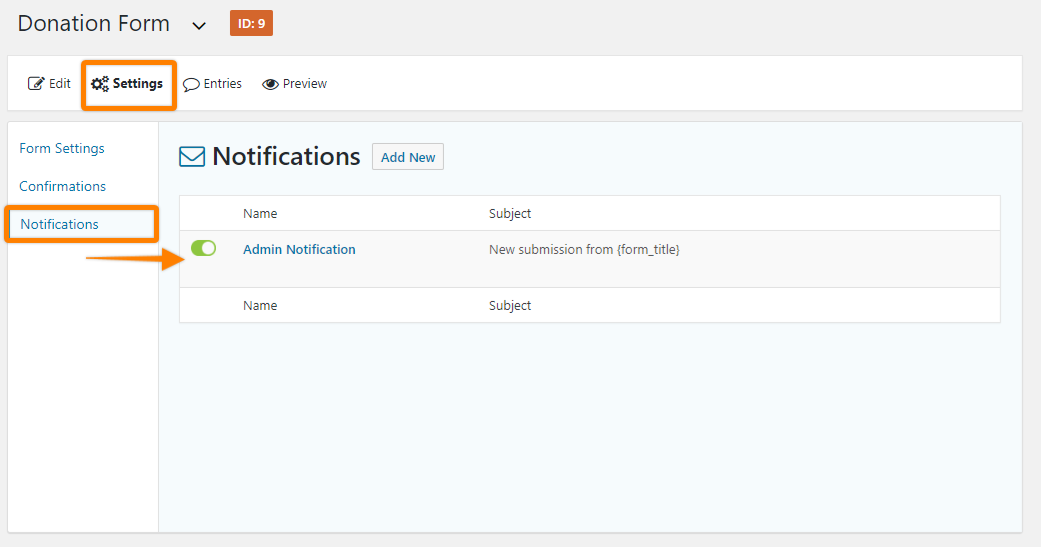
To access the notification emails, open the form editor for any form and click the Settings tab at the top. On the settings page, click Notifications from the list on the left. You’ll see a list of notifications emails for that form in the center of the dashboard. Click a notification’s name to edit it or click Add New to create a new one.
The notification editor is fairly straightforward. First give it a name so you can distinguish it from any other confirmation emails you create.
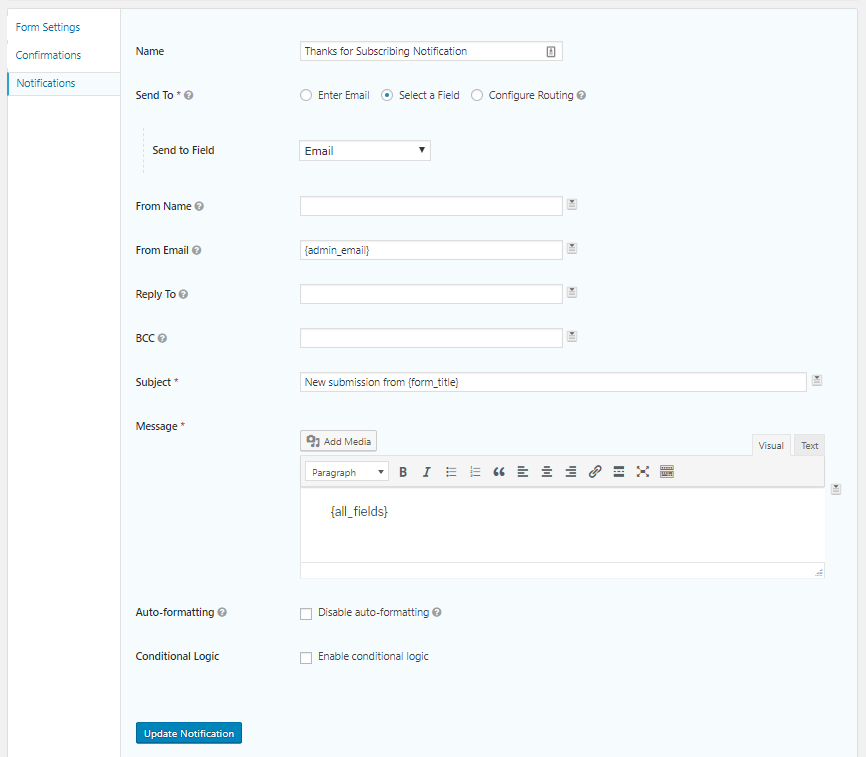
Send To determines where the notification email go. You can enter an email address, select a field from the form, or configure special routing (which lets you send a notification to different email addresses depending on values selected in the form). You can send a notification anywhere you like, but to confirm the user’s submission, use the Select a Field option and choose the Email field.
The other fields are simple to use as well:
- From Name: Enter the name you would like the notification email sent from. You can also select the name from available name fields.
- From Email: Enter the email address you would like the notification email sent from. You can also select the email from available email form fields.
- Reply To: Enter the email address you would like to be used as the reply address.
- BCC: Enter the emails of anyone you would like to receive a BCC of the notification email. Separate multiple email addresses with commas.
- Subject: Enter the subject of the email. You can also select one of the form fields to use as the subject.
The Message field is where you get the apply the tips we listed above. This is the content of the email the recipient receives.
The great part about the Message field is that it’s a WYSIWYG HTML editor like you have on your WordPress pages and posts. That includes all the usual editing and formatting tools.
In fact, like the other WordPress content editors, you can toggle to the plain text editor (top right of the Message field) and paste raw HTML. This means you can create beautiful emails in third party tools like Topol, Beefree, or Stripo and just paste their code into the Message field.
[content_upgrade cu_id=”14206″]Download this list of ways you can add content to get the most out of your form confirmation emails.[content_upgrade_button]Click Here[/content_upgrade_button][/content_upgrade]
Don’t Neglect Your Form Confirmation Emails
Confirming your subscribers’ and customers’ form submissions seems like a simple task, but it’s an important part of building great forms. Whether you use lead capture forms to grow your list, order forms to sell products or services, or simple contact forms to accept messages from your users, follow the tips above to create great confirmation emails.