Need to move your products or services online? Gravity Forms can help…
In the past few months, we have seen communities locked down, households isolated, and businesses forced to close their doors. But when one door closes another opens, which in the case of many businesses is the opportunity of selling online.
Selling online can be an extremely profitable venture at the best of times. But with whole communities now locked down, more people than ever before are going online to make purchases. By selling your products or services online, you can ensure that you continue to cater to the needs of your everyday customers, as well as potentially tap into a new market, and importantly, enable your business to weather this storm and remain profitable.
In this article, we run you through how to add a Gravity Forms payment form to your WordPress website so you can begin taking orders and payments online. We will discuss the kind of businesses and industries that can greatly benefit from using Gravity Forms. And we will then walk you through the process of installing the Gravity Forms plugin, creating a form, and integrating it with a payment processor, so you are ready to take payments on your WordPress website. Let’s get started…
Who Can Benefit From Using Gravity Forms?

Gravity Forms is an extremely popular and powerful WordPress plugin that supports a diverse range of customers and needs. Because Gravity Forms integrates with so many third-party solutions, the potential of what you can do with this plugin is limitless.
For those currently affected by the COVID-19 crisis, and trying to sell products or a service online, Gravity Forms may well be the perfect option for you. One of Gravity Forms many functionalities is that it can act as a standalone eCommerce solution. This means you can quickly and easily turn your website into an online store by simply adding a key form or two.
So who specifically can benefit from using Gravity Forms?…
- Shops with Physical Premises Selling Physical Products – If your store has recently had to shut due to COVID-19, then Gravity Forms can help you sell your products online.
- Restaurants and Cafes – Had to shut down your restaurant or cafe but still offering takeaways? Make it easy for your customers to order directly on your website by adding an order form.
- The Health Industry – If you run a gym, a yoga studio, or you are a personal trainer, then providing online workouts for a fee is a great option to get you through the next few months. With Gravity Forms, you can take payments on your site before allowing your clients to join your online boot camps.
- Any Other Face-to-Face Service that Can Be Taken Online – Are you a piano teacher, a therapist, or any other type of professional that usually offers a face-to-face service? Thanks to the internet, these services can now be taken online over the next few months – and Gravity Forms can help you to collect the payments.
Due to Gravity Forms’ advanced functionality, you can create complex forms that match the exact needs of your business. However, rest assured that the intuitive drag-and-drop visual form editor lends itself to a frustration-free design process. Gravity Forms also has an impressive security track-record, making it a best fit with any professional business that will have to deal with their customers’ data.
Gravity Forms is well-positioned to help a wide assortment of businesses and industries stay profitable during this period of uncertainty. So let’s now find out how to use Gravity Forms to turn your site into an online store…
How to Start Selling Online with Gravity Forms
Setting up Gravity Forms on your WordPress website is a quick and straightforward process. Whether you want to sell products or a service, this initial start-up procedure will apply to all websites…
Step 1: Install Gravity Forms on Your WordPress Website
Gravity Forms is a premium plugin, so before you can install it on your site you will need to hop over to the Gravity Forms website and make a purchase.
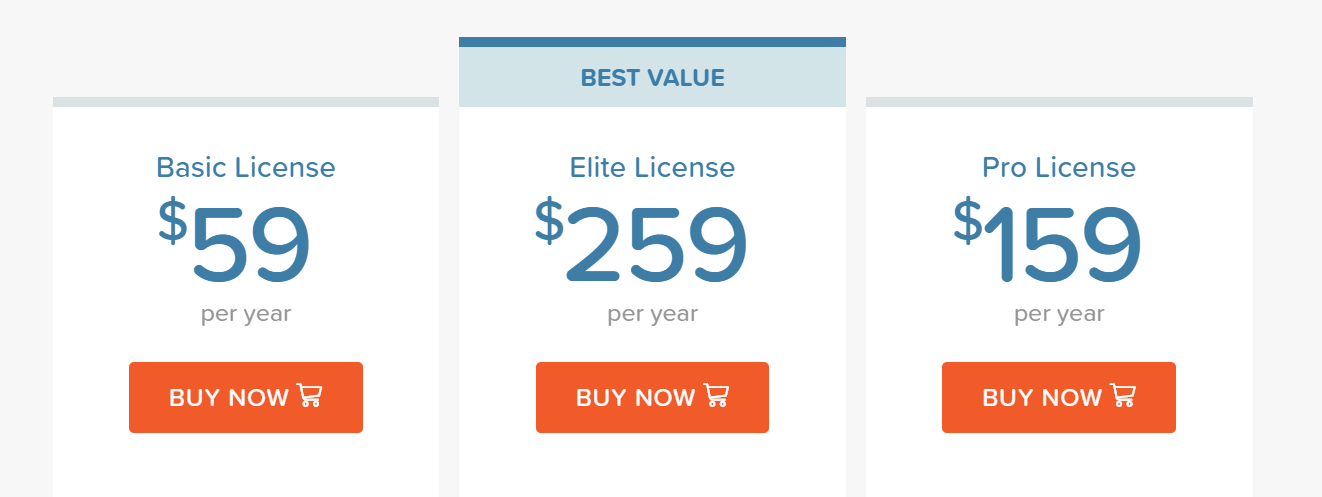
Note: Payment processor integrations are not available on the Gravity Forms Basic plan. Depending on the payment gateway you want to use, you will need to buy either the Elite or Pro package.
After you have made a purchase, the plugin can be downloaded directly from your Gravity Forms account dashboard and then uploaded to your WordPress website. You will also need to enter the license key into your WordPress dashboard to validate your installation of Gravity Forms.
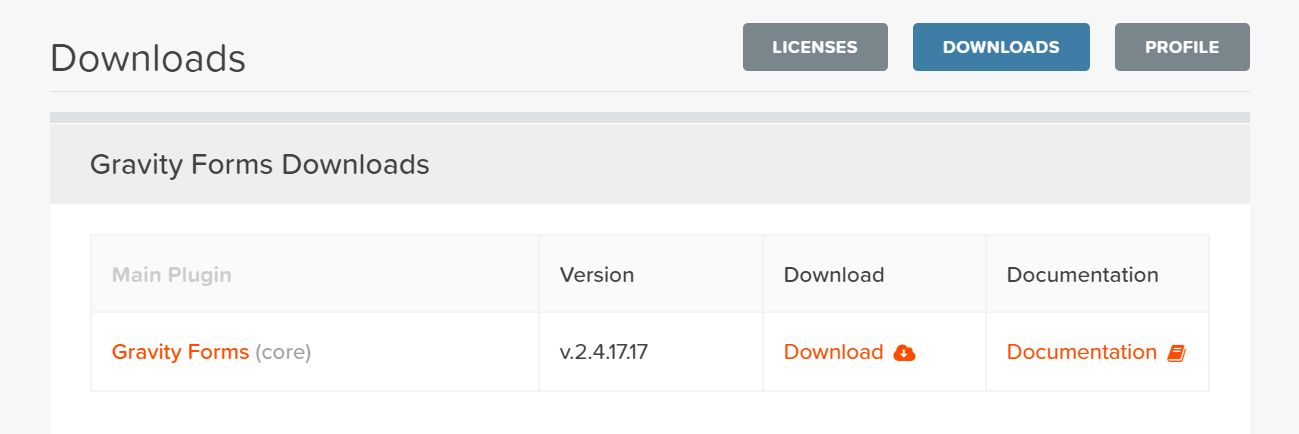
Gravity Forms provides in-depth documentation to support the plugin, so if you need any help with the installation process check out this Getting Started Guide.
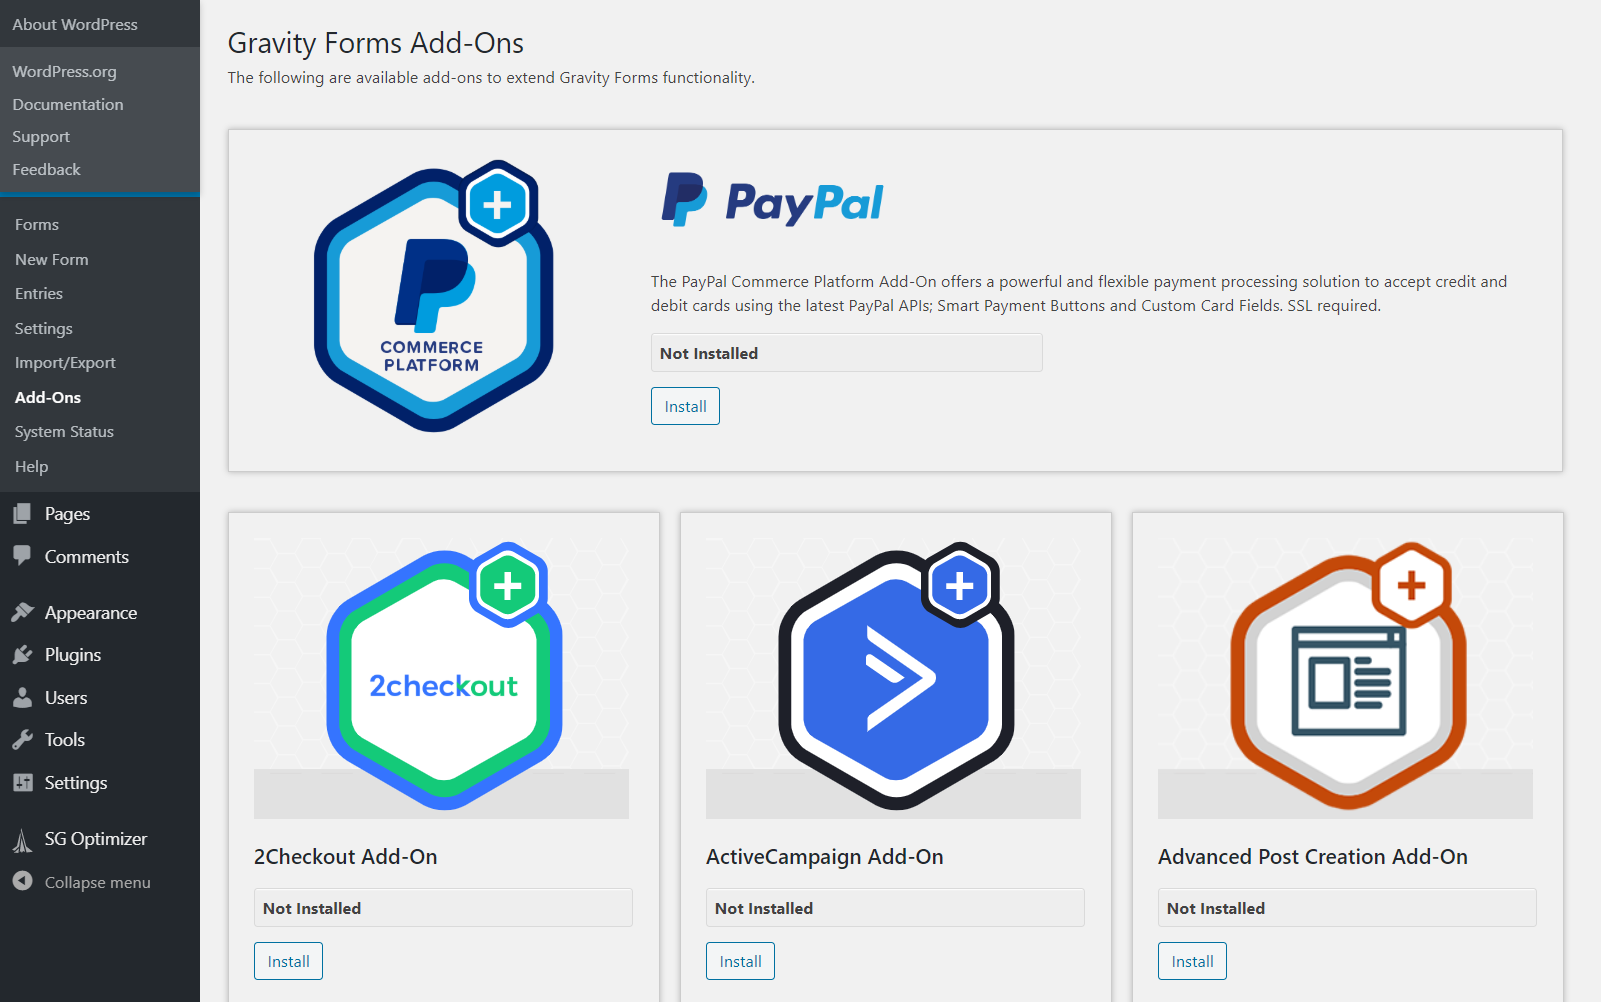
Step 2: Install the Appropriate Payment Processor
As mentioned, Gravity Forms integrates with numerous payment processors, giving you extensive options over the payment provider you use. Here are just a few of the payment add-ons that you can choose from…
- Stripe
- PayPal (Payments Standard and Pro)
- Square
- 2Checkout
- Authorize.net
Selecting the right payment provider for your business can be a difficult decision. Try considering these key points before making your mind up…
- Payment Options – Each payment processor offers a range of different payment methods that your customers can use to make a purchase on your site. As well as all major debit and credit card providers, other payment options to look out for include credit card types that are local to your area of business, as well as Android and Apple Pay.
- Fees – All payment processors charge transaction fees, which vary greatly in price. Transaction fees can also differ depending on the products you are selling, and the country/currency you are selling in. However, choosing the payment processor with the cheapest transaction fees isn’t always the right option – often higher fees mean that better tools, features, and support are offered, which can be well worth the extra money.
- Currencies – If you are based outside of the US then it is always worth checking that the payment processor deals with your local currency (and again check the fees charged for that currency).
- Support – Reliable support is always a must when you are selling online. Do your research and find out which payment providers are known for their high-level support. 24/7 live chat or phone support within your region is always useful, as well as a user-friendly help center.
Payment processors can be installed from within your WordPress dashboard, or downloaded from within your Gravity Forms Account’s interface.
Again, there is extensive documentation written on how to integrate Gravity Forms with all of the payment add-ons.
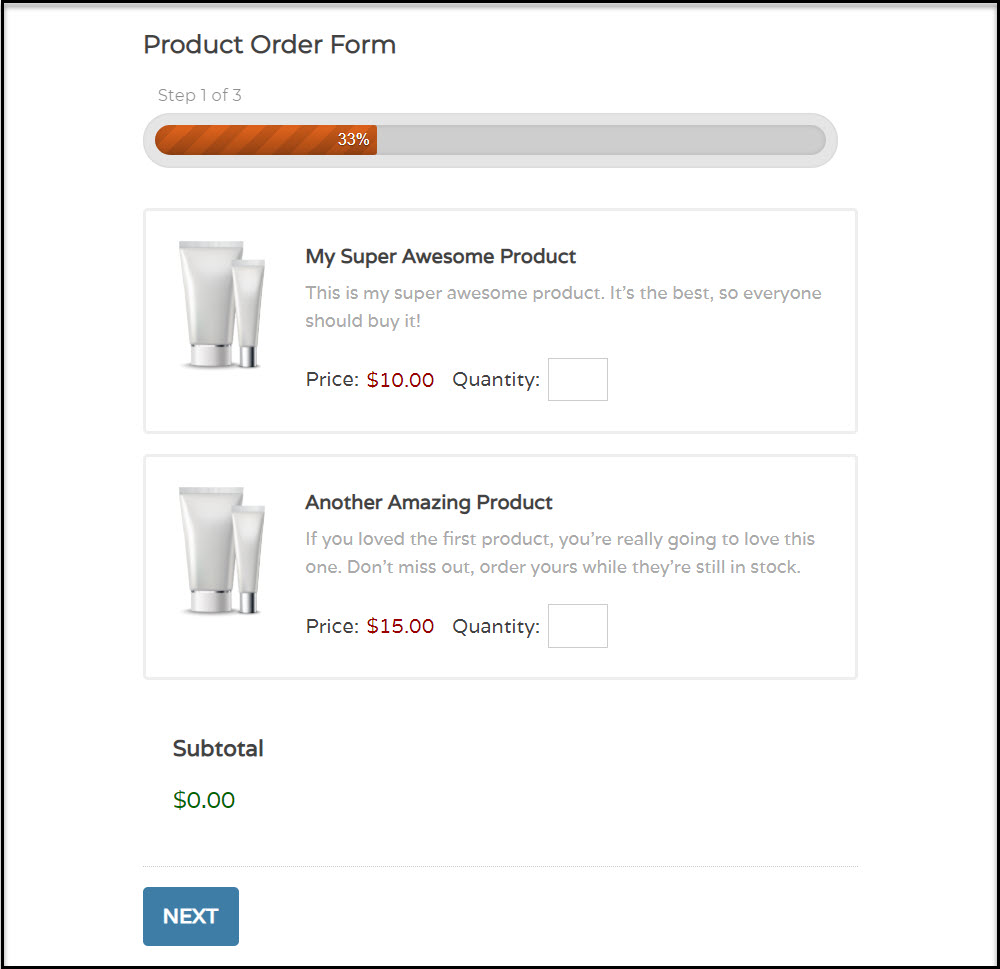
Step 3: Create a Payment Form
With Gravity Forms you can easily create stylish and functional forms to your exact specifications, using the drag-and-drop form editor. The form editor can be found in your WordPress dashboard under Gravity Forms > New Forms.
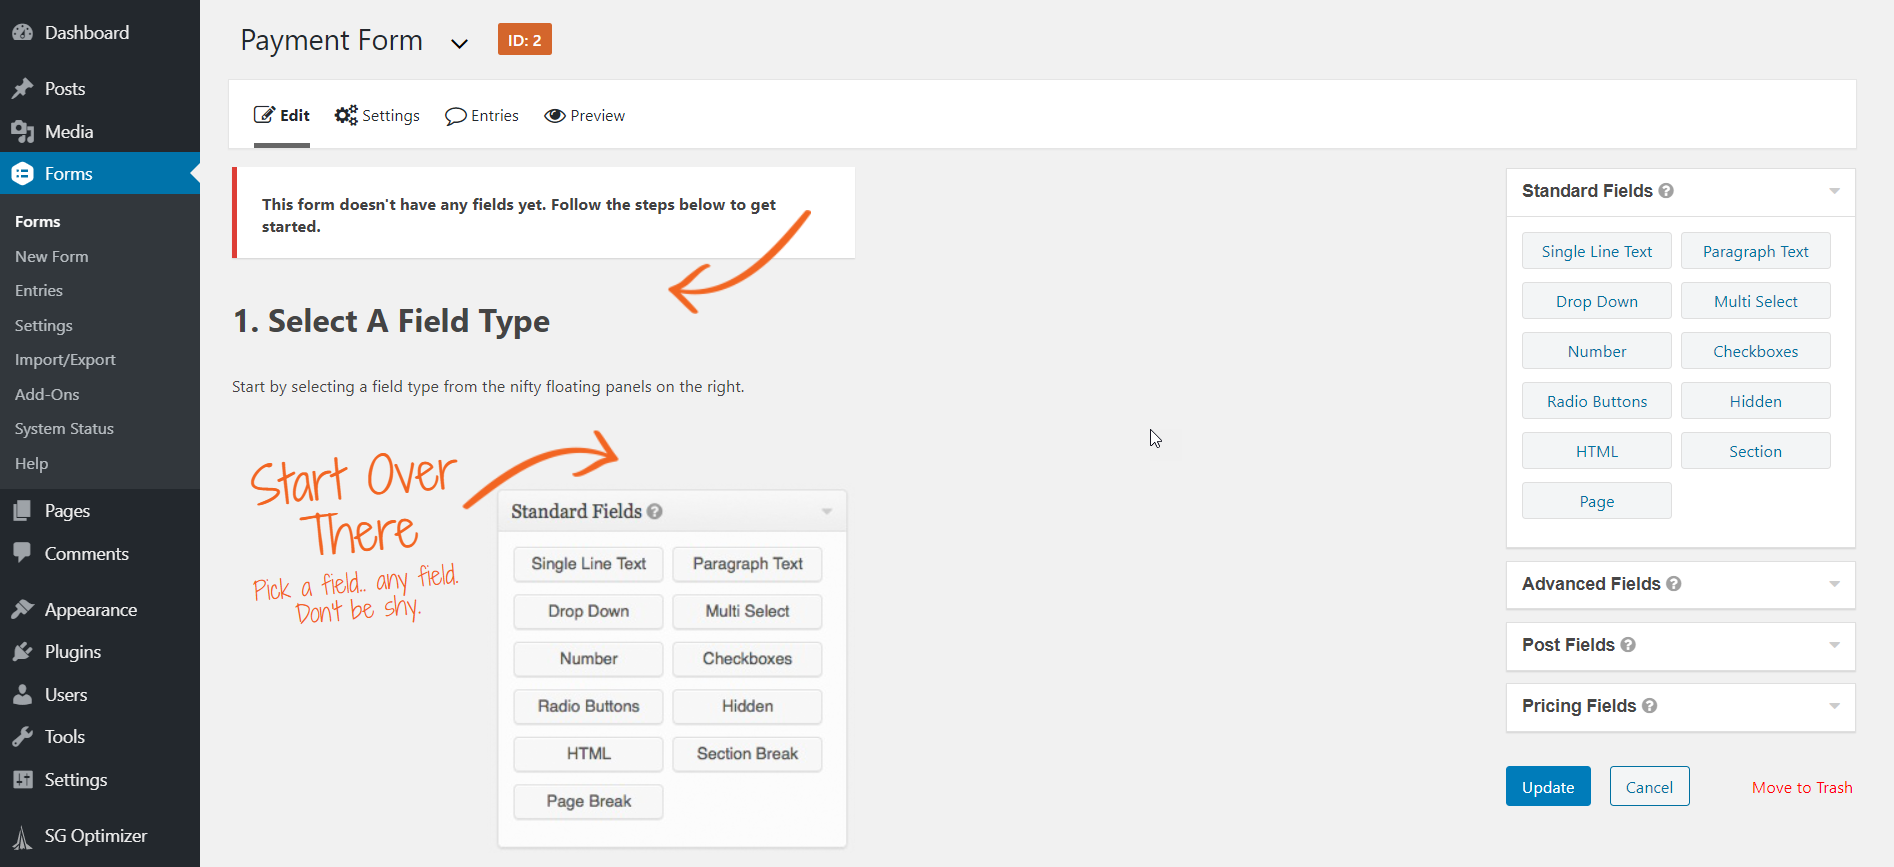
To use the form editor, simply drag and drop the form fields that you want to display on your form into the editing area. You can edit the text and appearance of each form field you add, and change the order of fields by simply dragging and dropping them around the page.
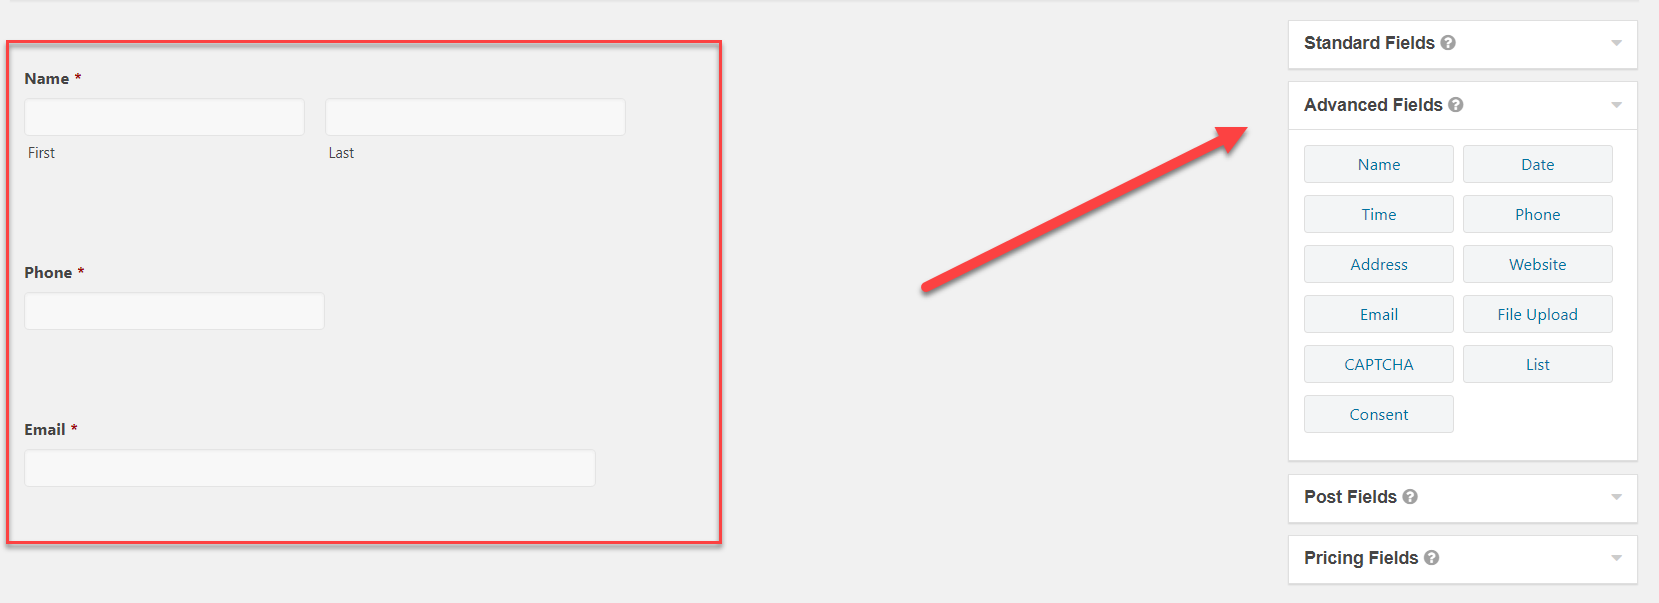
The type of form you create will very much depend on your business, and the types of products or services you are selling. However, there are some general form fields that all forms will need regardless of industry – for example, name, phone number, email, and address. These fields can be found on the right-hand side of the form editor, in the Advanced Fields category.
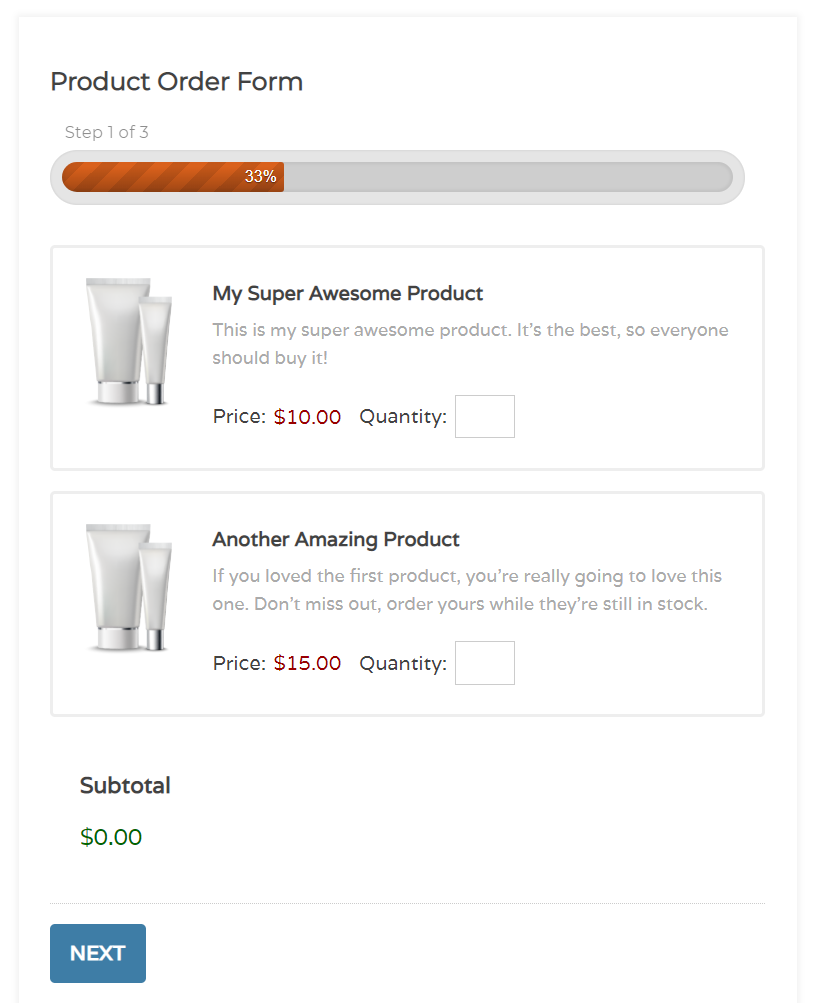
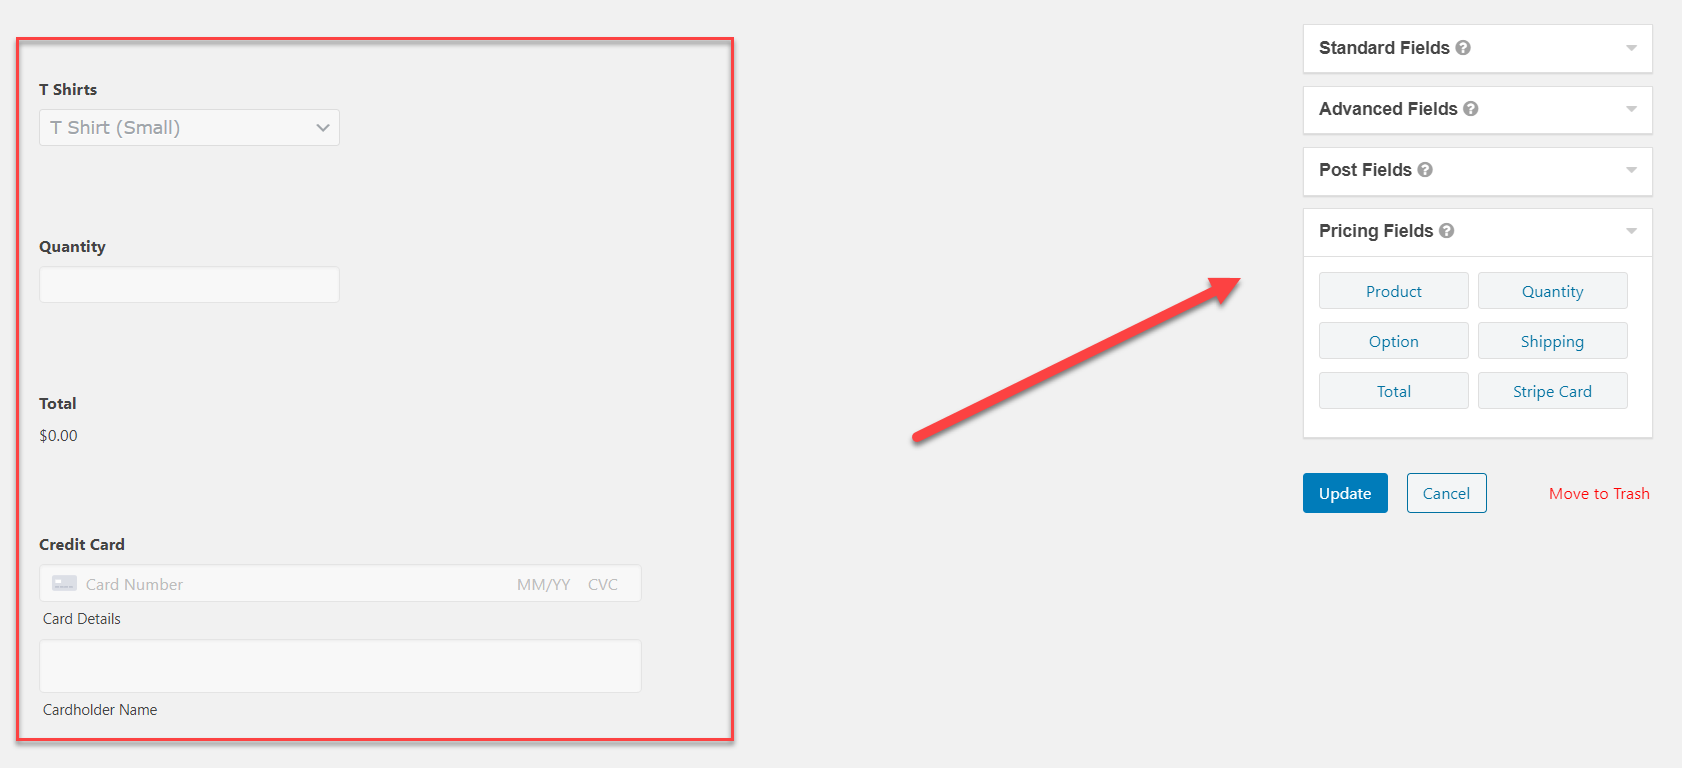
You will also see a section of form fields entitled Pricing Fields. These fields display the products or services you are selling, explain shipping fees, and calculate the total price – all essential form fields for a payment form.
Make sure you Update (save) your form regularly while you build it, and select Preview from the top menu bar to view your form on the front end of your website.
Step 4: Create a Feed for Your Payment Form
To connect your form with your payment processor you will need to create a form feed. This is a quick and easy process that is written about extensively within the Gravity Forms documentation, with clear step-by-step instructions laid out for each payment add-on.
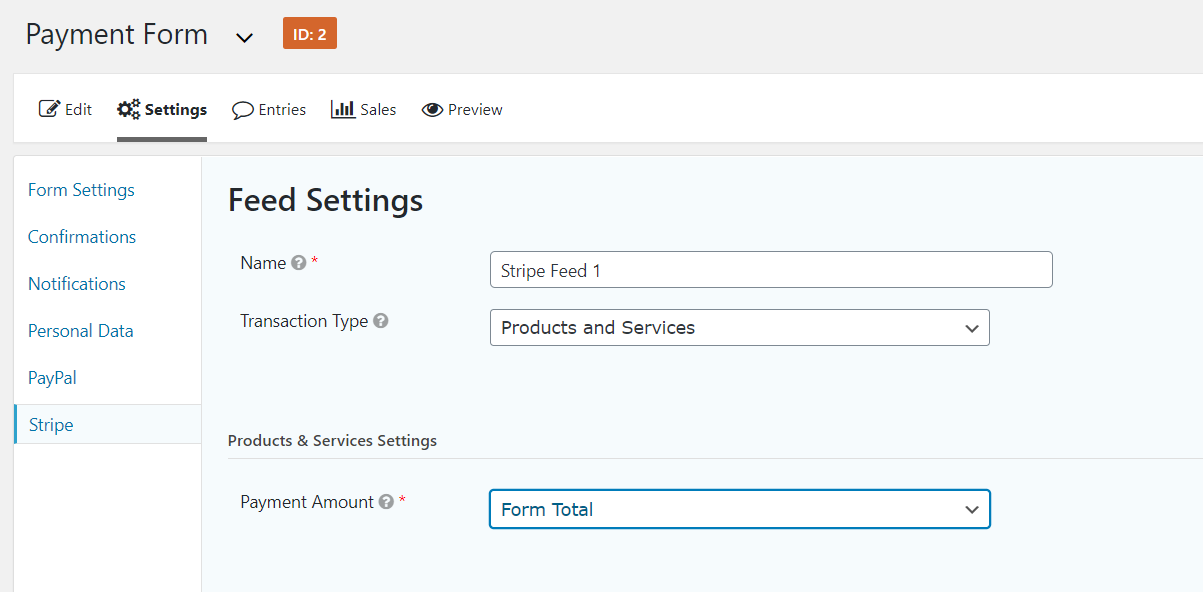
Note: If you aren’t yet ready to sell your products or services, next to Mode, select Test – you are only able to receive live payments once your form is in Production mode.
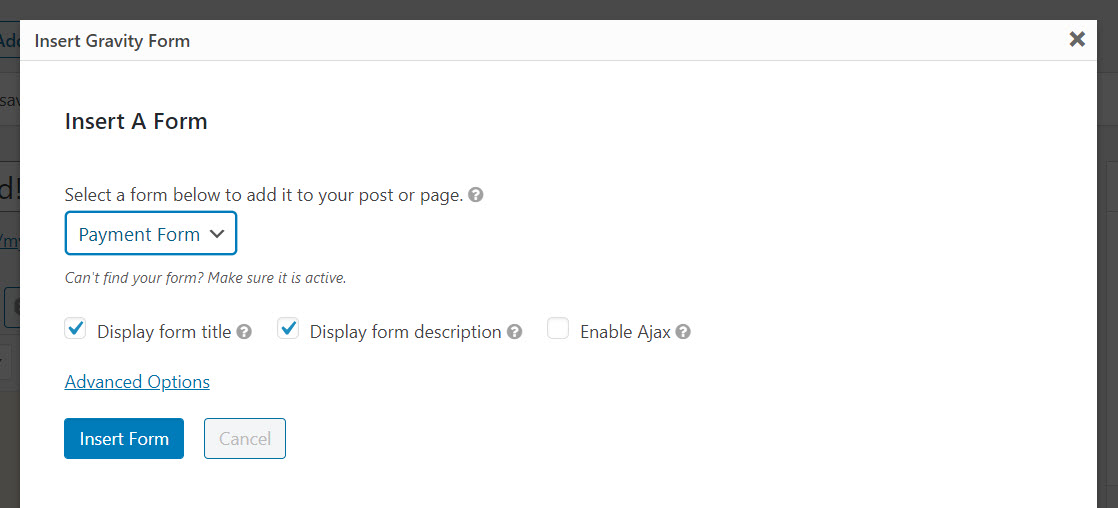
Step 5: Embed the Form in your Website
Once your form and feed are both complete, all that is left to do is to embed your form into a page or post on your website.
To do so, you will need to open the appropriate page and click in the page editor, where you want your form displayed. If you are still using the Classic Editor, then simply click on the Gravity Forms Add Form button to insert the form into your page.
However, if your preferred choice is the Gutenberg Editor, you will need to type Gravity into the block Search function. You can then select your new form and embed it into the block.
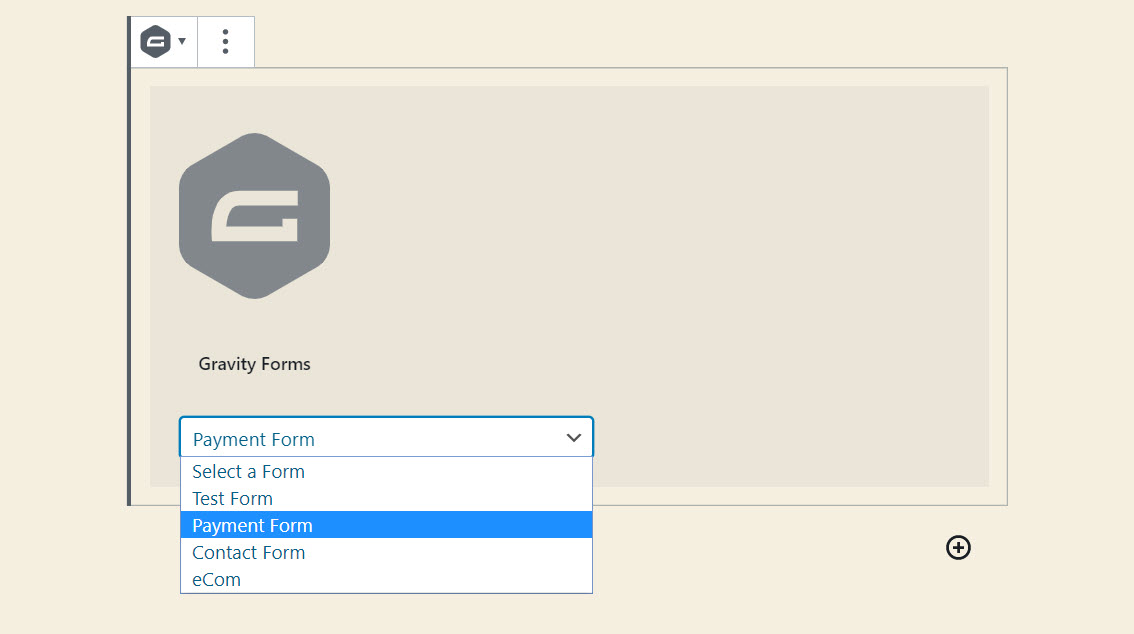
Note: Remember to Preview your form and then test it works to make sure it not only looks good but also works!
Final Thoughts on Selling Online with Gravity Forms
Although we have given you a quick tutorial on how to create a payment form, the Gravity Forms plugin is capable of much more when it comes to eCommerce. Here are just a few options…
- Email Marketing – Gravity Forms integrates with a number of email marketing services including ActiveCampaign, AWeber, Campaign Monitor, Constant Contact, Email Octopus, GetResponse, and MailChimp, to name a few. Use an email marketing service to stay in contact with your customers and bring them back to your website for repeat purchases.
- Coupons – Use the Gravity Forms official Coupons Add-On to incentivize your customers with discounts and promotions.
- CRM – Integrate with Hubspot, Zoho, or Capsule CRM, to help you manage your customers, sales, and pipelines.
- Accounts – Gravity Forms integrates with the Classic Freshbooks invoicing service, helping you keep on top of your accounts.
Gravity Forms also integrates with an impressive number of third-party add-ons, enabling you to further extend your eCommerce forms. Check out this tutorial by GravityWiz explaining how, by integrating the two plugins, you can easily add the option of a store pick up to your form.
So now you know what Gravity Forms can do and how it can help your business – are you ready to start selling online?
Any questions on how to set up a payment form with Gravity Forms? Feel free to ask away in the comments below…

If you want to keep up-to-date with what’s happening on the blog sign up for the Gravity Forms newsletter!