How to… Send Form Entries to Google Sheets Using Zapier

Google Sheets is an extremely useful tool that allows you to easily manage, analyze, and share data. With the Gravity Forms Zapier Add-On, you can automatically send form entries to Google Sheets, streamlining the data transfer process and ultimately enabling you to gain clear insight into the information you have collected.
In this ‘How to…’ tutorial, we discuss why you might want to send your form submissions to Google Sheets and the benefits of doing so. We then give you a step-by-step rundown of how to set up Zapier automation to get your form entries sent to Google Sheets.
Why Send Your Form Entries to Google Sheets?
There are numerous reasons why you might want to send your form entries to Google Sheets. Let’s take a look at some of them…
- Large Amounts of Data – If you have collected a high volume of submissions, or if your forms contain a large number of fields, then sorting through this data within your WordPress admin can be frustrating, time-consuming, and ineffective.
- View, Sort, and Analyze Data – Google Sheets makes it extremely easy to view, sort, and analyze data. You can view your form entries as a single directory of information, or drill down to analyze specific form fields, create graphs and charts to help further compare and interpret the data, and much more.
- Collaboration – Google Sheets makes it easy to share data within your organization, allowing employees to view form entries without needing access to your website dashboard.
Gravity Forms uses Zapier to connect forms with Google Sheets – so let’s now find out a bit about Zapier and how to integrate it with Gravity Forms…
How to Integrate Zapier with Gravity Forms

Gravity Forms has a Zapier Add-On which allows you to connect your forms with over 2,000 apps. One of our most popular add-ons, Zapier creates endless possibilities for form entry management, interactions between other third-party services, and automated workflows, to name a few options.
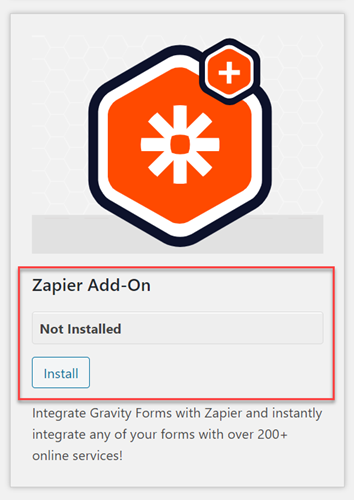
To install the Gravity Forms Zapier Add-On, simply open your WordPress dashboard and select Forms > Add-Ons. Then scroll down the page to Zapier and click on Install.
If you haven’t got one already, you will also need to sign up for a free Zapier account.

Create a Zap
To get started, you need to create a Zap to automate the process of sending your form entries to Google Sheets. To do this, open your Zapier dashboard and click on Make a Zap. Zapier will then walk you through each step of creating a Zap.
Step One: When this Happens…
Choose the Gravity Forms application and then New Form Submission for the event that will trigger the Zap.

Test Your Trigger
Zapier will now ask you to Test your Trigger. To do this, you need to copy the Webhook URL and then switch to a new tab and open your WordPress dashboard.

From within WordPress admin, open the form you want to integrate with Zapier (or create a new form) and then select Form Settings. You need to set up a Zapier Feed for the form, so select Zapier > Zapier Feeds Add New, and then paste the Webhook URL into the feed.
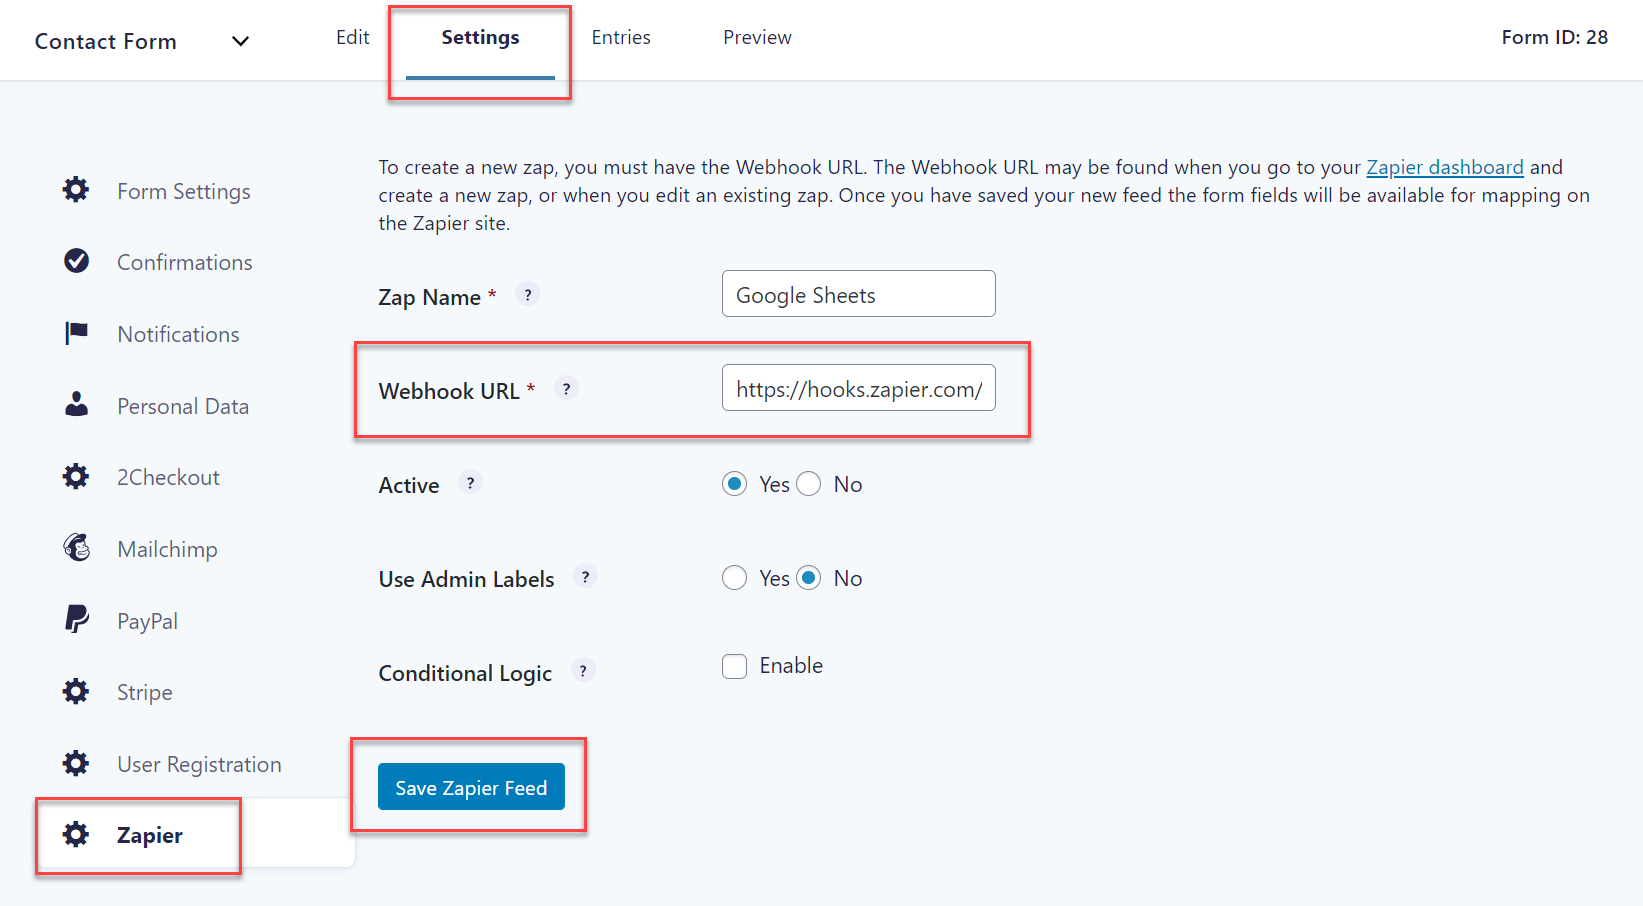
Select Save Zapier Feed and then switch back to your Zapier dashboard and click on Test Trigger. After a few seconds you should see this success message…

You are now ready to move onto Step Two of creating a Zap.
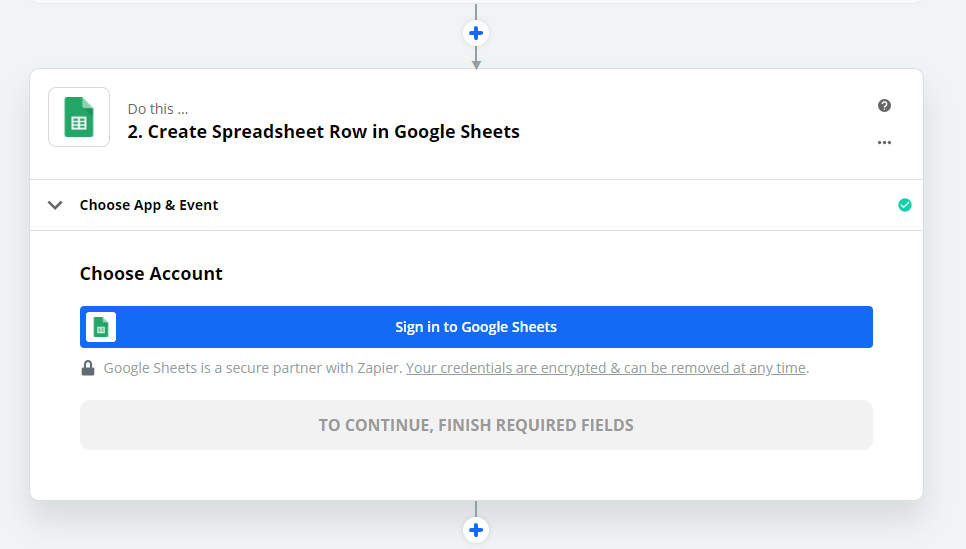
Step Two: Do this…
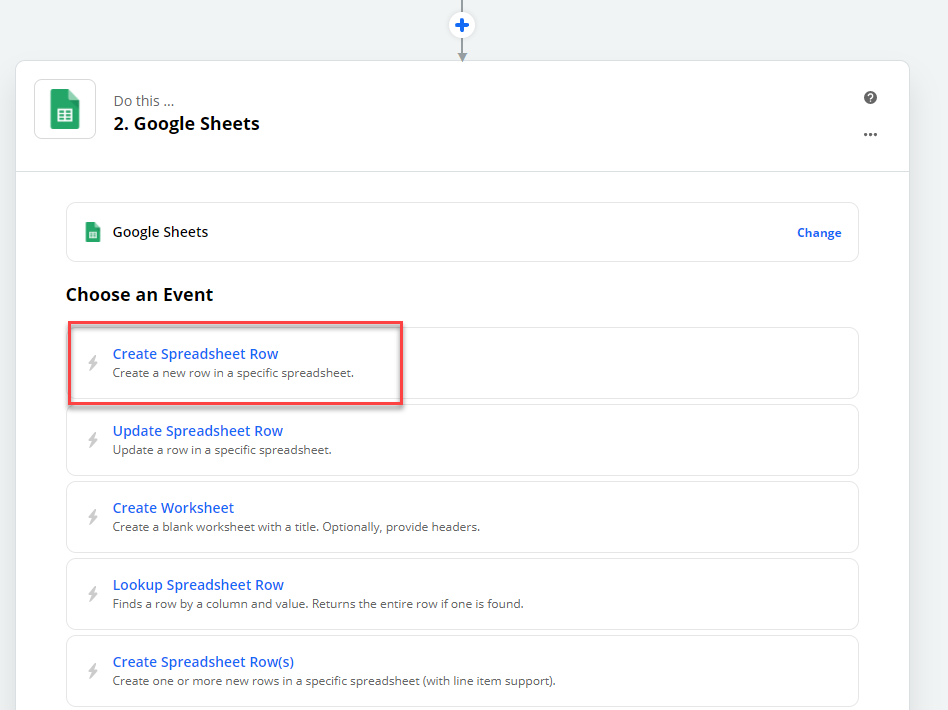
Select the Google Sheets app and then choose an Event. There are numerous event options for Google Sheets, and the event you select will very much depend on how you want to use your form data once it has been transferred to Google Sheets.
Here we have chosen one of the most common options, Create Spreadsheet Row. This will simply add any new form submission into a new row on your chosen spreadsheet.
Sign Into Google Sheets
Zapier will now ask you to sign in to Google Sheets.
Select a Spreadsheet
Next you will need to choose which spreadsheet you want your form submissions sent to. You may well want to create a new spreadsheet – if so, go ahead and do this in Google Sheets and then refresh the Zapier page – you should now see your new spreadsheet listed.
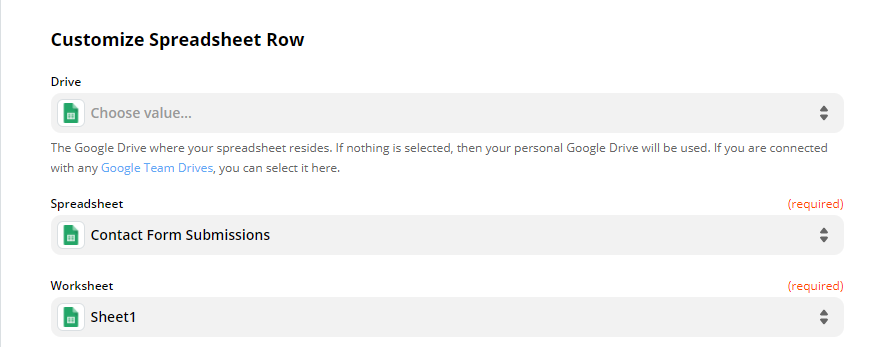
Map Form Fields to Spreadsheet Columns
Once you have selected a spreadsheet and worksheet, you now need to map your form fields to the spreadsheet columns.
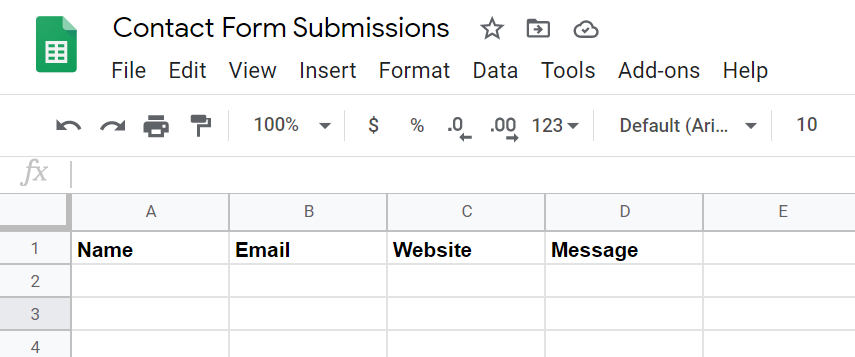
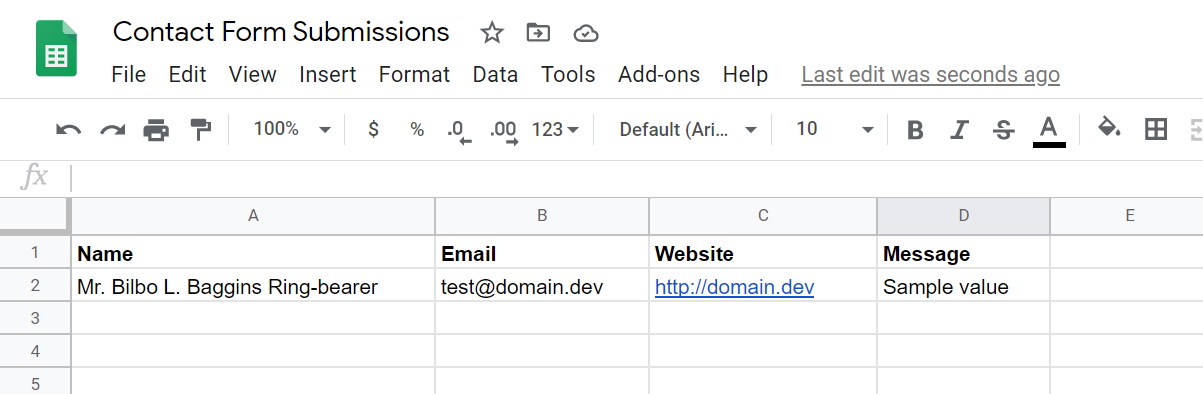
Before entry values can be mapped to a specific column of the spreadsheet, the columns first need to be defined. To do so, you’ll need to access your spreadsheet in Google Sheets and add column headers to each column you want to place values inside. For example, the first row of your spreadsheet should look something like this…
Next, back in your Zapier dashboard simply go through each column on the page and map a form field to it. When the entry is sent to Google Sheets, it will use this mapping to determine where to put the values from your form.
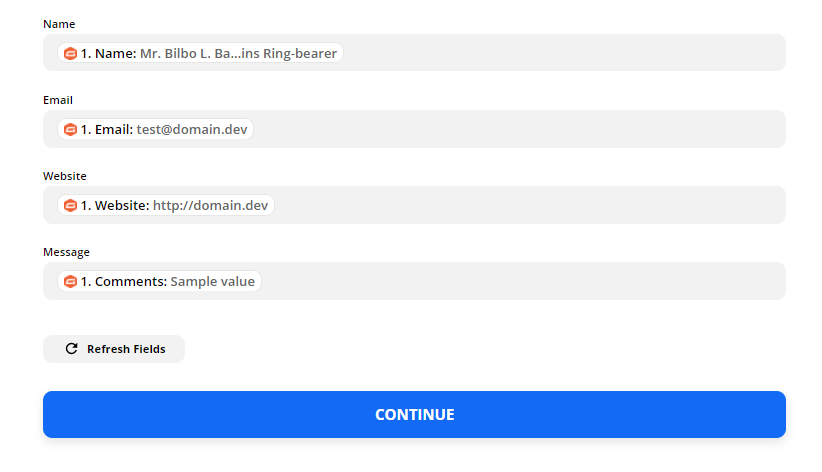
Once you have mapped all your fields, double-check your work and click Continue.
Test the Zap
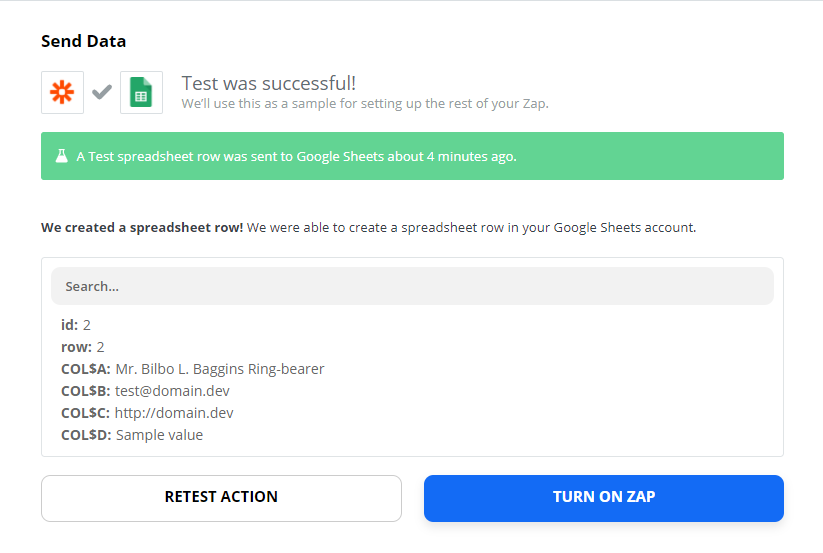
Zapier will now ask you to test the Zap – click Test and Continue. Check your spreadsheet – the test values should now be populated as a new row in your spreadsheet!
If everything worked as expected, Zapier will display this message and you can go ahead and Turn on the Zap…
Once the Zap is enabled, any time you receive a form submission, a new row will be created in your spreadsheet.
For further information on setting up Gravity Forms Zapier Add-On, check out the docs.
Install Zapier v4 Beta Today!
Gravity Forms has recently released a beta for Zapier v4. If you are a Zapier power user you are going to love the new release because now you can do all your Zaps’ configurations inside of Zapier instead of the Add-On.
Additionally, Gravity Forms can be used as a Zapier action as well as a Zapier trigger, and much more! For further information on Zapier v4 Beta, please check out our Docs.
If you are keen to get onboard with Zapier v4 Beta, follow the installation instructions provided and be sure to report back on what you think of it!
Taking It a Step Further
In this article we’ve only scratched the surface of what you can do with Zapier to integrate Gravity Forms with Google Sheets as well as other Google tools. Here are a few examples…
- Updating Spreadsheets from Form Entries in WordPress
- Sending Product Information to Google Sheets
- Sending Form Entries to Google Calendar
- Uploading Files from Google Drive to WordPress
Are you doing something awesome with Gravity Forms and Google Sheets? Let us know in the comments below…
Don’t Have Gravity Forms Yet?
If you don’t have Gravity Forms or the Zapier Add-On, don’t worry. You can still test out everything in this article for free inside your own personalized Gravity Forms demo and see why Gravity Forms is the top choice for WordPress sites worldwide.
Already in love? Purchase our premium WordPress form plugin today!

If you want to keep up-to-date with what’s happening on the blog sign up for the Gravity Forms newsletter!